เขียนเขียนโปรแกรมสร้างเว็บไซต์ Front-End Developers จาก Figma Front-End Designers ที่ได้ออกแบบไว้
ทำต่อจากบทความนี้ https://www.glurgeek.com/education/figmawebdesigner/
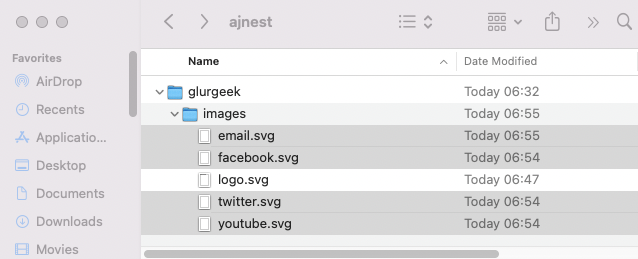
1. ทำการสร้าง Folder เพื่อสร้างที่เก็บไฟล์ สำหรับเตรียม Materials ทำ Website
สร้าง Folder ชื่อเว็บไซต์ และ Sub Folder ชื่อ images สำหรับเก็บรูปต่าง ๆ ที่ใช้

2. ทำการแปลง Logo และ Contact ต่าง ๆ จากข้อความ ให้เป็นรูปภาพ .SVG
ใช้ไฟล์ .svg จะทำให้เวลาทำเว็บไซต์ Zoom in แล้วภาพจะไม่แตก
เลือก Navigation Bar ทำการ Unlock ตรงส่วน GlurGeek ในงานให้ Right Click –> Outline Stroke เพื่อปรับให้คมชัดและเวลาแสดงหน้าผลหน้าจอจะปรับให้เหมาะสมกับ Devices ขนาดต่าง ๆ
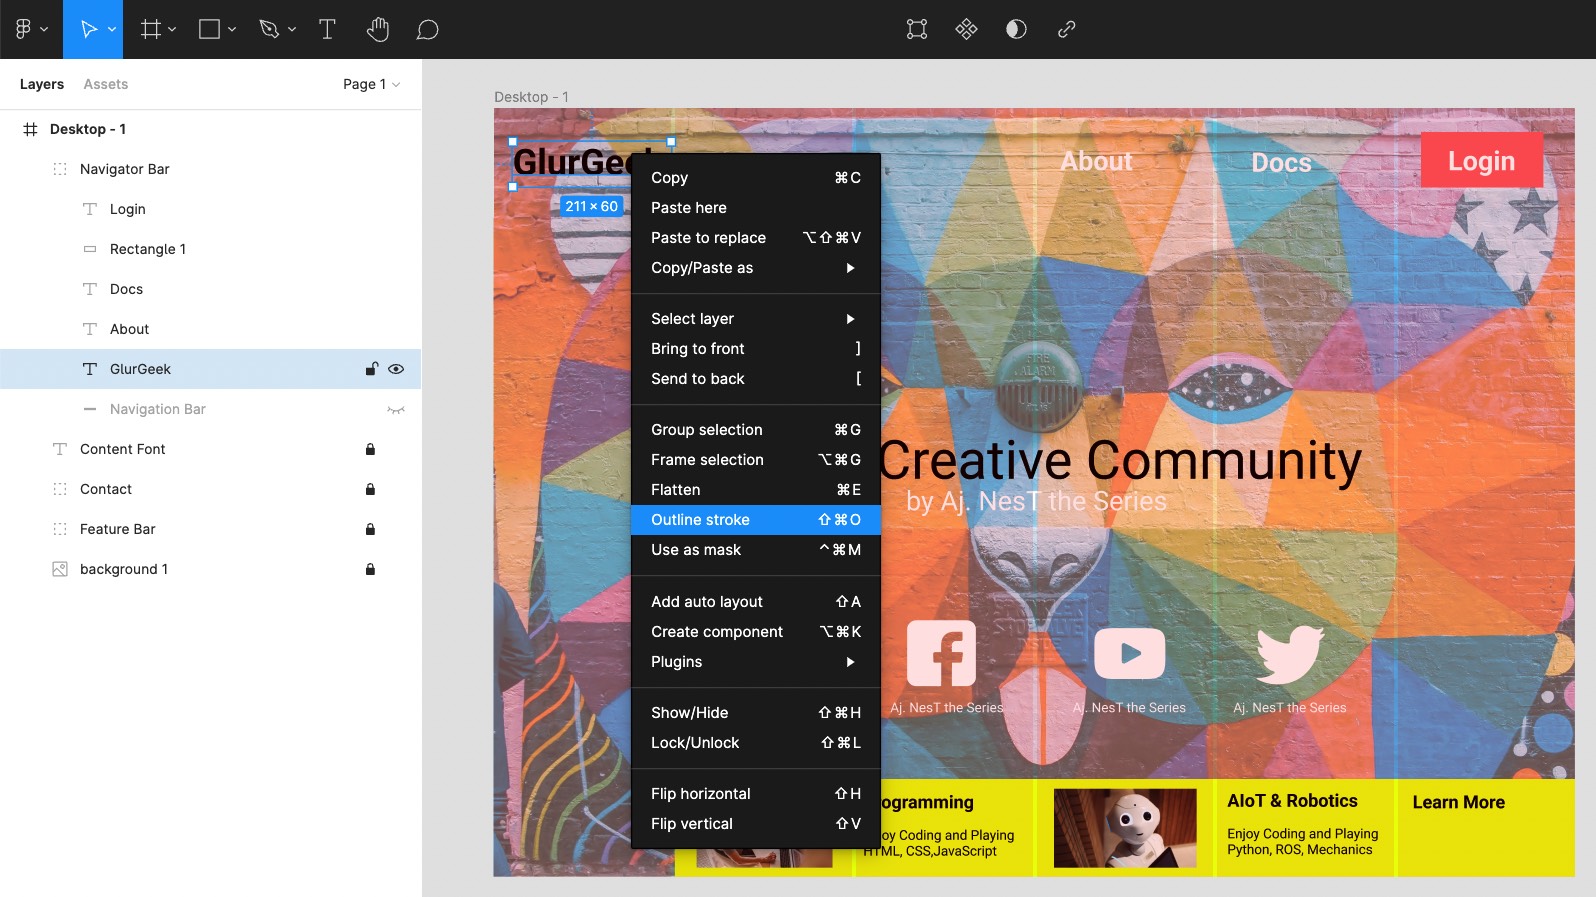
ลอง Zoom In (Control/Command + Scroll Mouse) ไปที่โลโก้ GlurGeek ให้ไปด้านขวาล่างตรง Export เปลี่ยนเป็น .SVG –> Export GlurGeek เพื่อให้ได้รูปภาพ
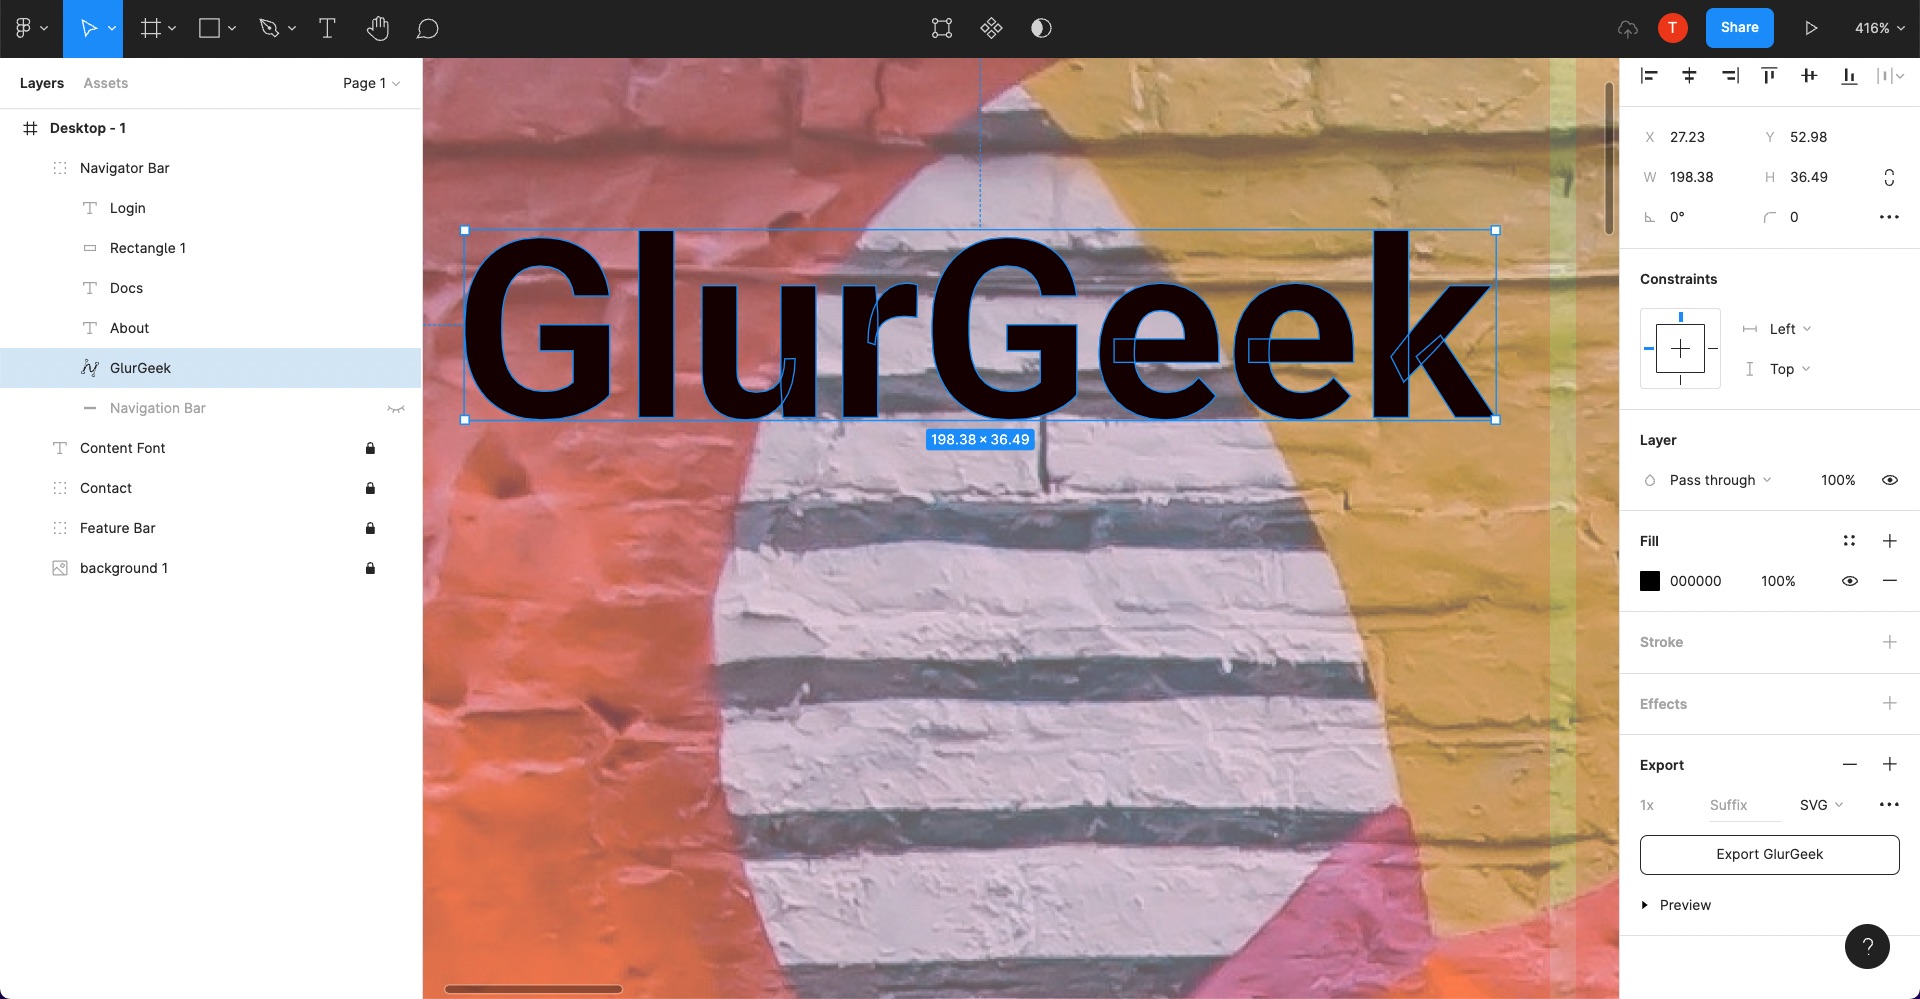
นำไปเก็บไว้ใน Folder ของ images
ทำ Icon ส่วน Contact ต่าง ๆ ให้เป็นรูปภาพ .SVG เช่นเดียวกัน
ไปที่ Contact ทำการ Unlock แล้วเลือกทีละ Icon ทำการ Export เลือกเป็น SVG –> Export ให้เป็นรูปภาพทีละรูป
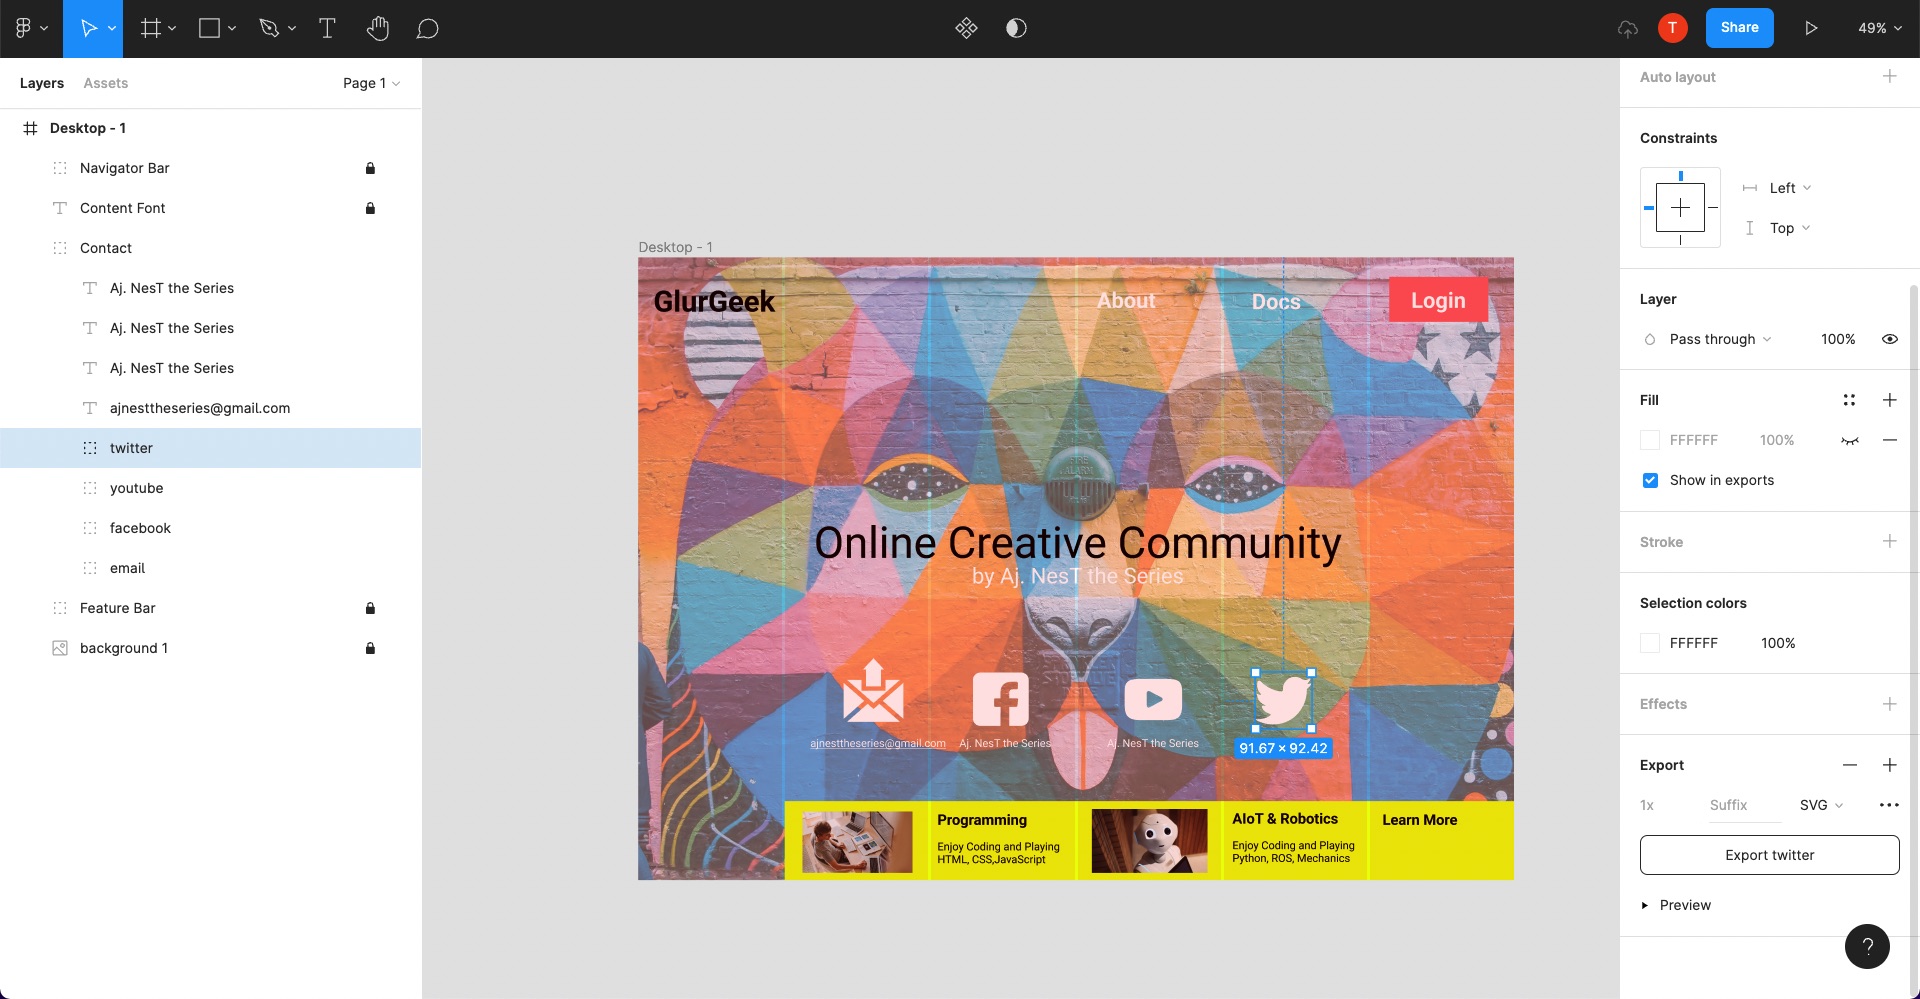
นำรูปที่ได้ไปใส่ไว้ใน Folder ชื่อ images
ไปที่ Feature Bar ทำการ Unlock เลือกรูปภาพ ไปที่ Export อันนี้จะใช้เป็น JPG ความละเอียด 2x –> Export ทั้ง 2 รูปของ Feature Bar
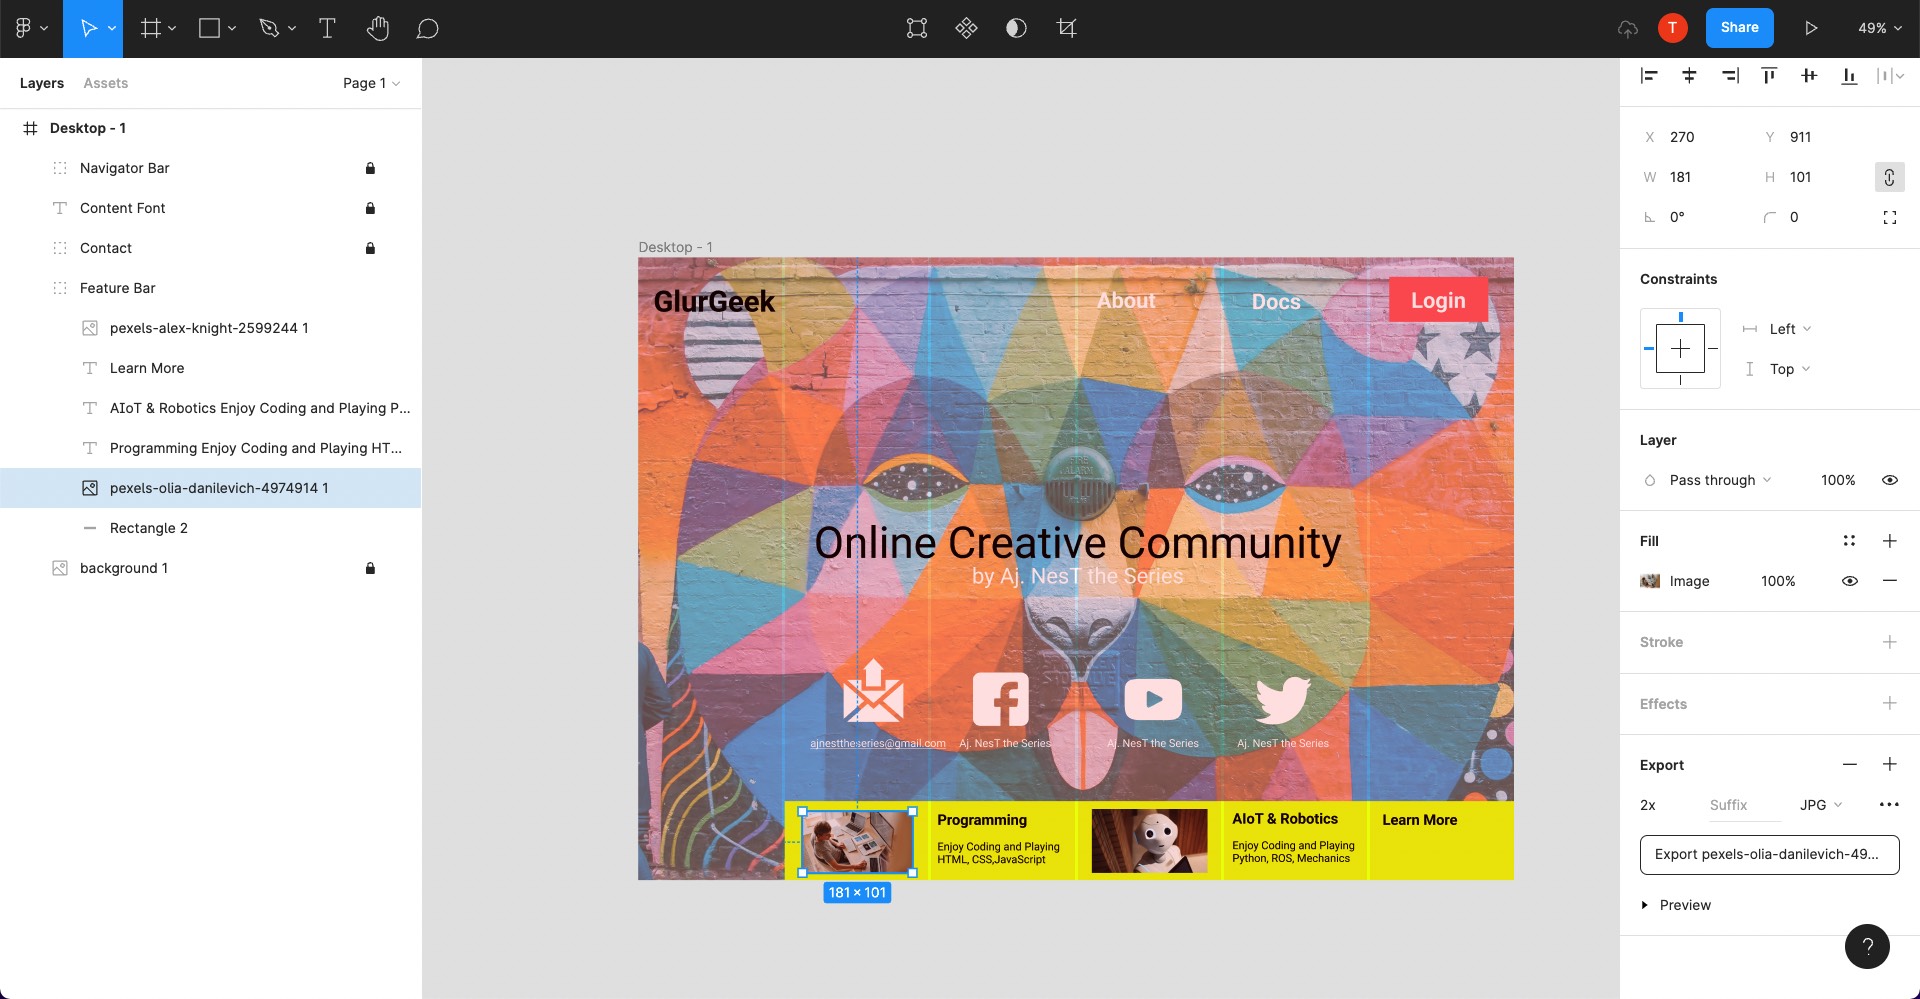
ตั้งชื่อรูป programming.jpg
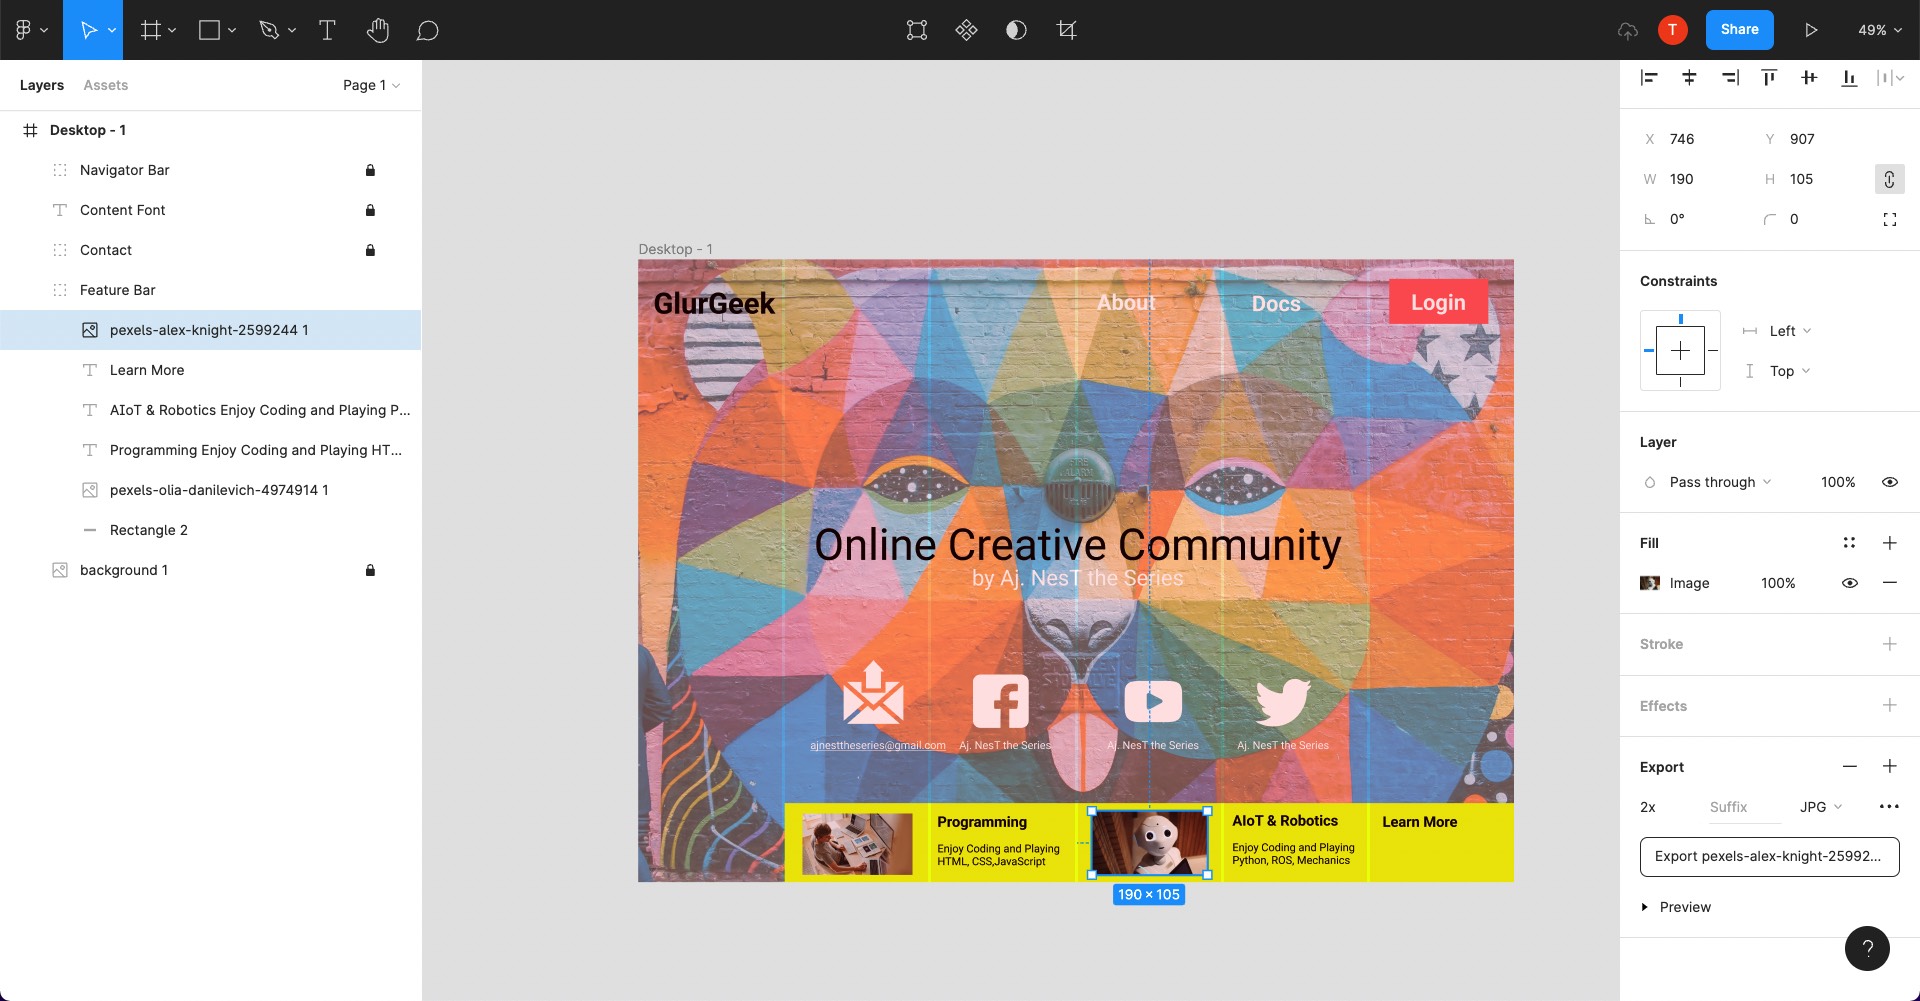
ตั้งชื่อรูป aiot.jpg
แสดง Folder ของ images

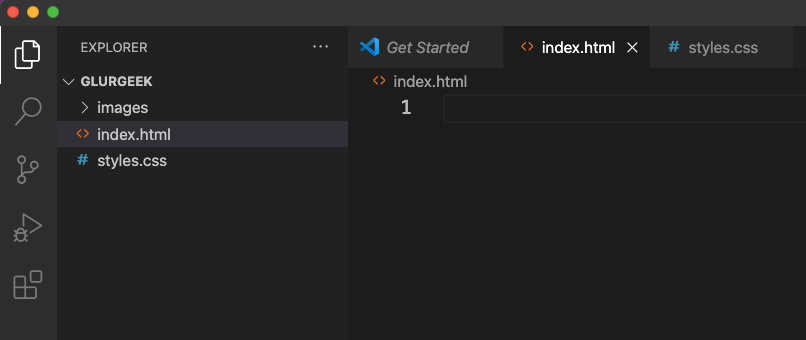
3. เขียนโปรแกรม HTML CSS สำหรับ Front-End Developers ด้วย Visual Studio Code
เปิดโปรแกรม VS Code นำ Folder ของ glurgeek ที่ได้จัดทำไว้ลากมาใส่
ทำการ New File สร้าง 2 ไฟล์ คือ index.html และ styles.css
ให้ดูองค์ประกอบต่าง ๆ ของ Figma Website ที่เราออกแบบ จะแบ่งเป็น Header, Body และ Footer

3.1 เขียนโปรแกรม HTML ไฟล์ index.html
แบ่งเป็น 3 ส่วน ได้แก่ 1. ส่วน Header (Navigation Bar) 2. ส่วน Contents (Content Font และ Content) และ 3. ส่วน Footer (Feature Bar)
โครงร่างของ index.html
<!DOCTYPE html>
<html>
<head>
    <meta charset="UTF-8">
    <meta http-equiv="X-UA-Compatible" content="IE=edge">
    <title>GlurGeek Website</title>
    <meta name="description" content="profile">
    <meta name="viewport" content="width=device-width, initial-scale=1.0">
    <link rel="stylesheet" href="styles.css">
</head>
<body>
    <main>
        <!-- Navigation Bar -->
        <header>

        </header>
        <!-- Contents -->
        <section class="info">

        </section>
        <!-- Feature Bar -->
        <section class="feature">

        </section>
    </main>
</body>
</html>

ไฟล์ index.html
<!DOCTYPE html>
<html>
<head>
    <meta charset="UTF-8">
    <meta http-equiv="X-UA-Compatible" content="IE=edge">
    <title>GlurGeek Website</title>
    <meta name="description" content="profile">
    <meta name="viewport" content="width=device-width, initial-scale=1.0">
    <link rel="stylesheet" href="styles.css">
</head>
<body>
    <main>
        <!-- Navigation Bar -->
        <header>
            <nav>
                <img class="logo" src="images/logo.svg" alt="logo">
                <div class="links">
                    <a href="#">About</a>
                    <a href="#">Docs</a>
                    <button class="button_med" href="#">Login</button>
                </div>
            </nav>
        </header>
        <!-- Contents -->
        <section class="info">
                <h1 class="content_font1">Online Creative Community</h1>
                <h4 class="content_font2">by Aj. NesT the Series </h4>
                <div class="icons">
                    <div class="icon">
                        <img src="images/email.svg" alt="email">
                        <p class="icon_info">ajnesttheseries@gmail.com</p>
                    </div>
                    <div class="icon">
                        <img src="images/facebook.svg" alt="facebook">
                        <p class="icon_info">Aj. NesT the Series</p>
                    </div>
                    <div class="icon">
                        <img src="images/youtube.svg" alt="youtube">
                        <p class="icon_info">Aj. NesT the Series</p>
                    </div>
                    <div class="icon">
                        <img src="images/twitter.svg" alt="twitter">
                        <p class="icon_info">Aj. NesT the Series</p>
                    </div>
                </div>
        </section>
        <!-- Feature Bar -->
        <section class="feature">
            <div class="feature">
                <img src="images/programming.jpg" alt="programming">
                <div class="feature_info">
                    <p class="feature_top">Programming</p>
                    <p class="feature_bottom">Enjoy Coding and Playing
                        HTML, CSS,JavaScript</p>
                </div>
            </div>
            <div class="feature">
                <img src="images/aiot.jpg" alt="aiot">
                <div class="feature_info">
                    <p class="feature_top">AIoT and Robotics</p>
                    <p class="feature_bottom">Enjoy Coding and Playing
                        Python, ROS, Mechanics</p>
                </div>
            </div>
            <div class="feature">
                <div class="feature_info">
                    <p class="feature_top">Learn More</p>
                </div>
            </div>
        </section>
    </main>
</body>
</html>
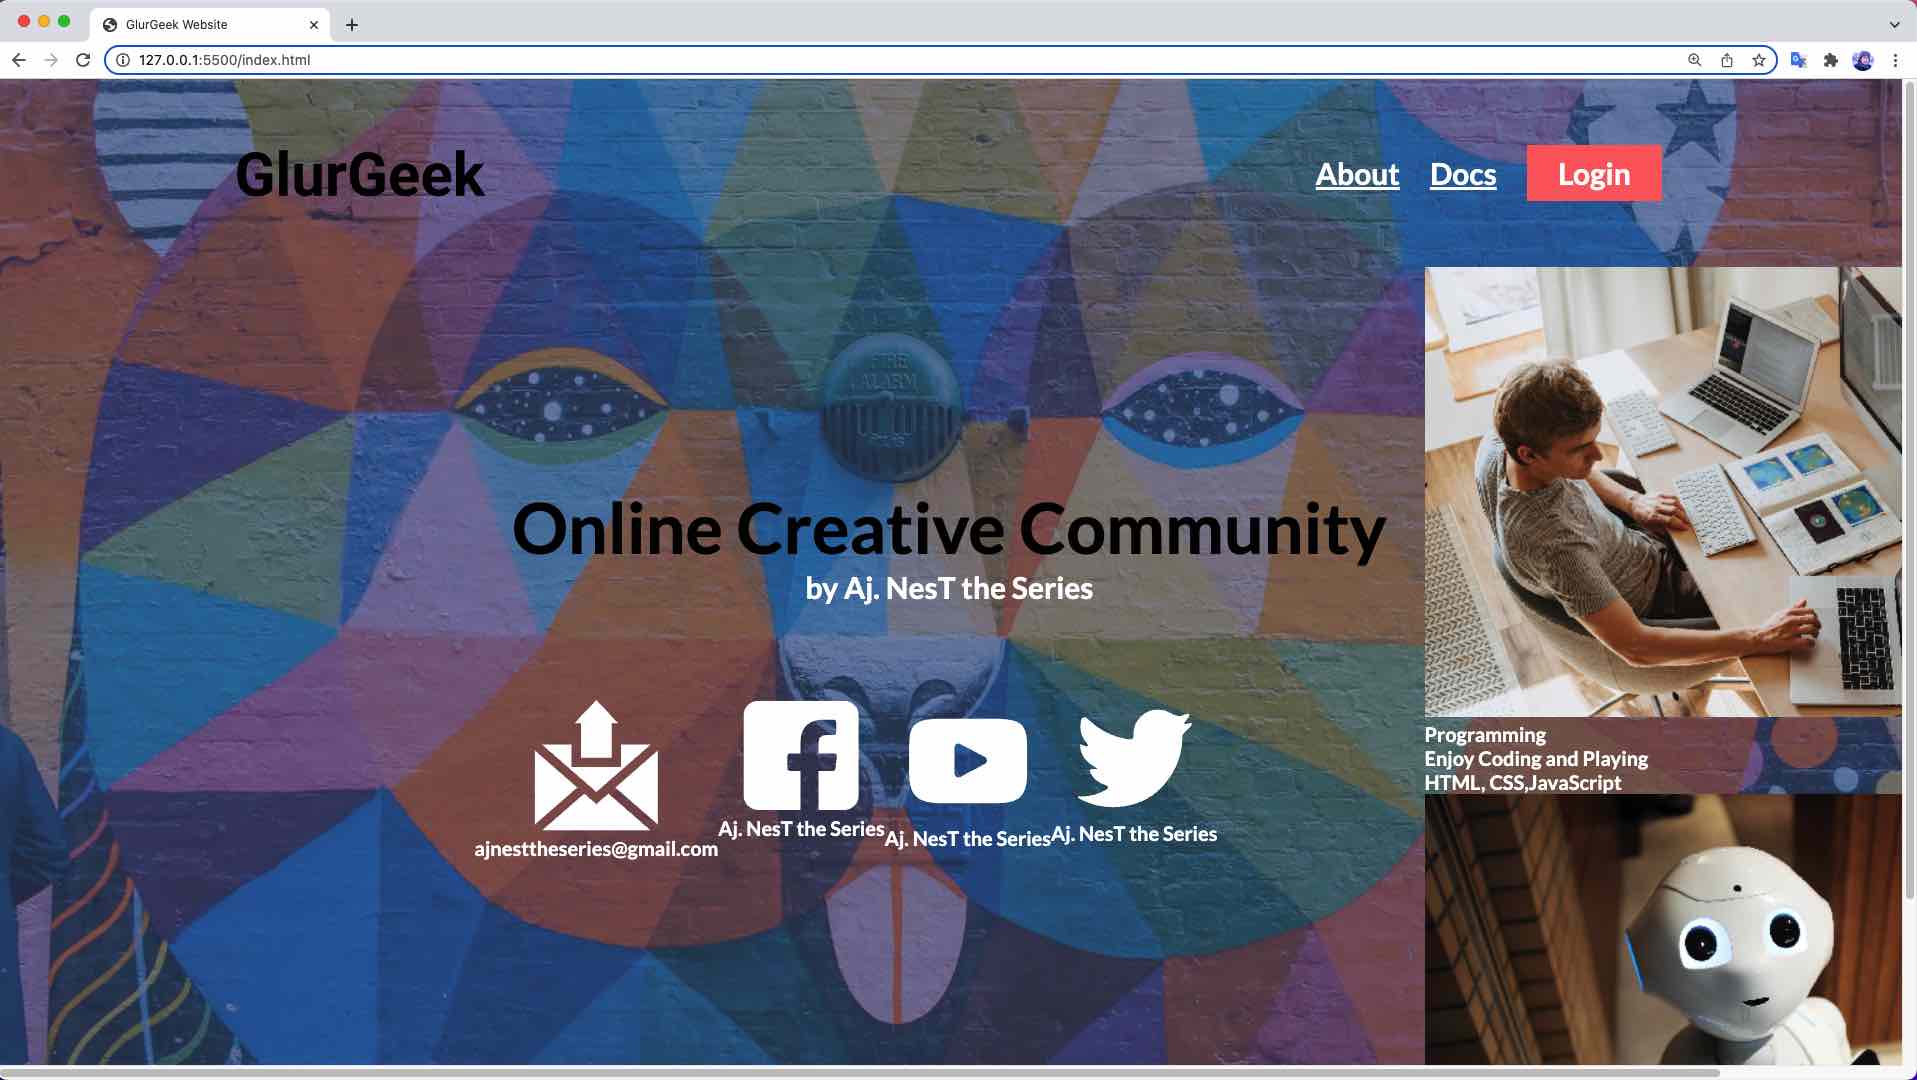
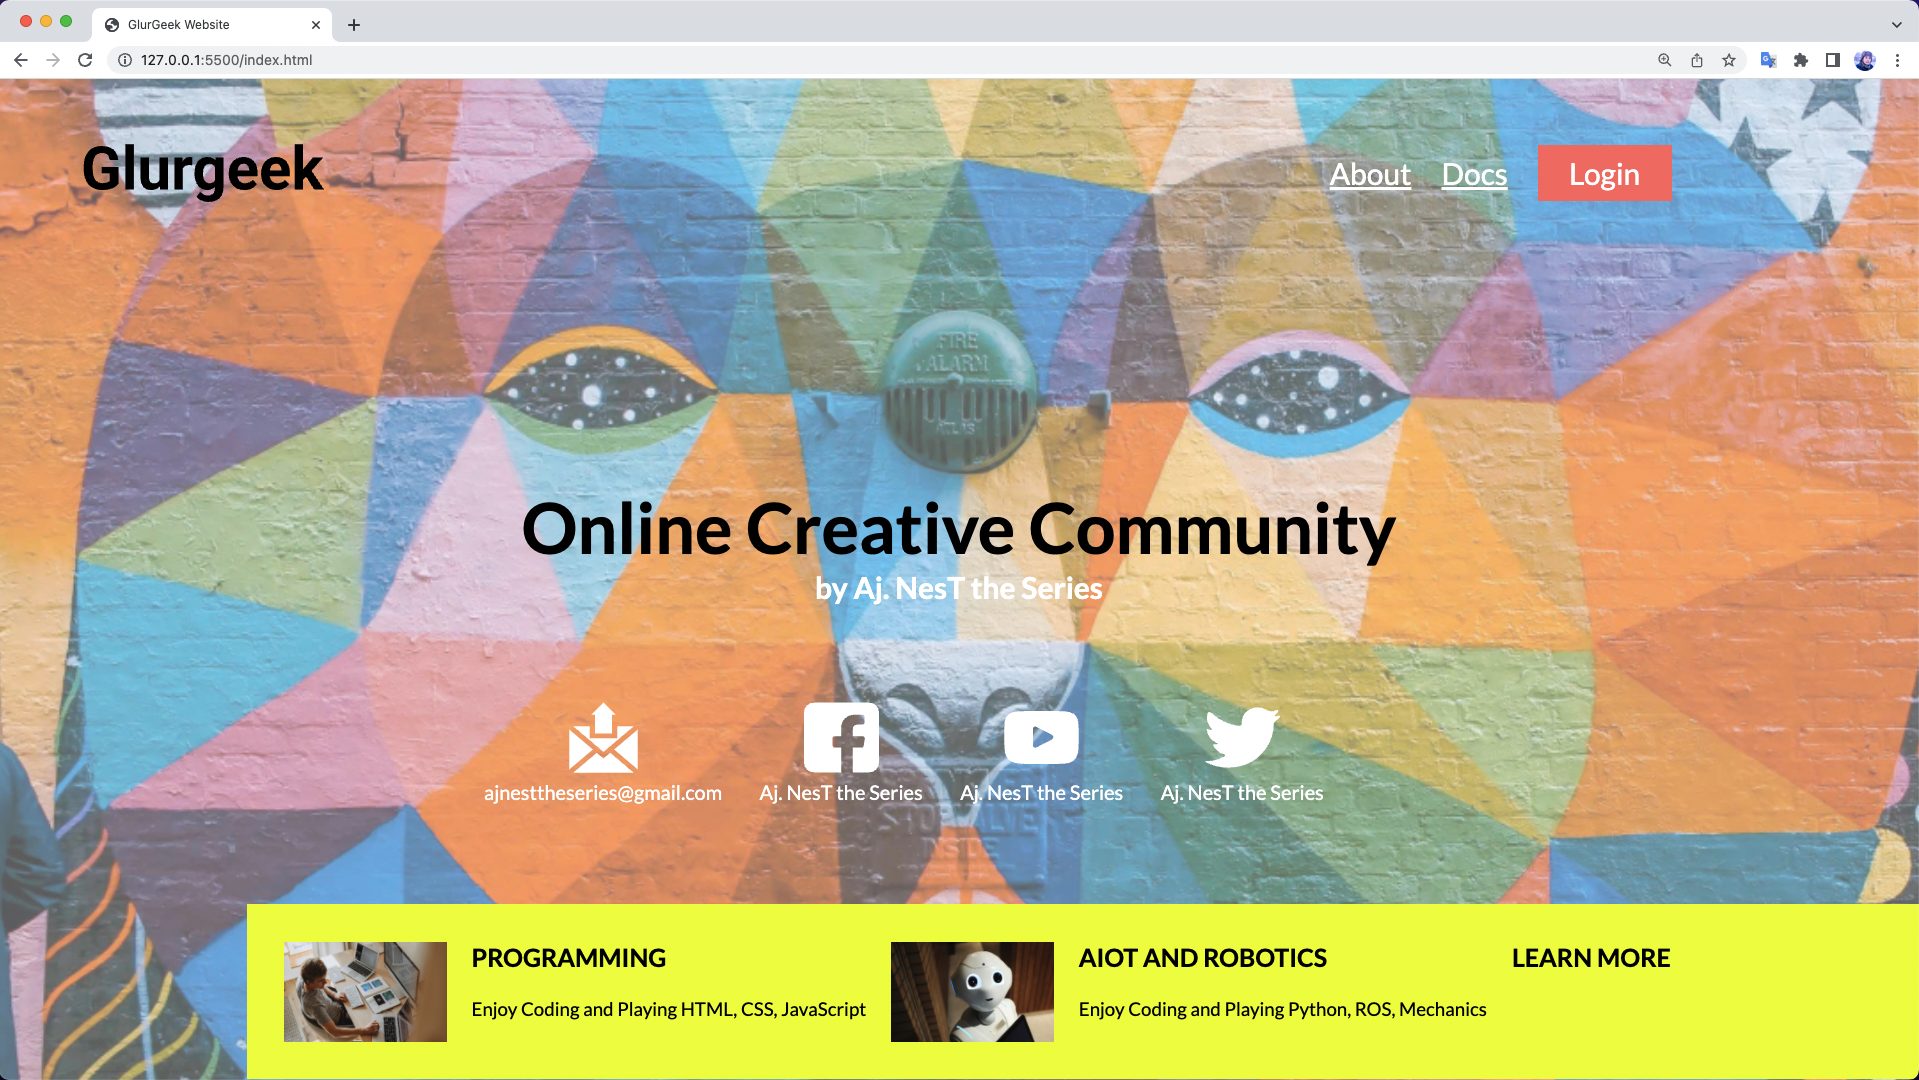
ผลลัพธ์ที่สร้างขึ้นของไฟล์ index.html
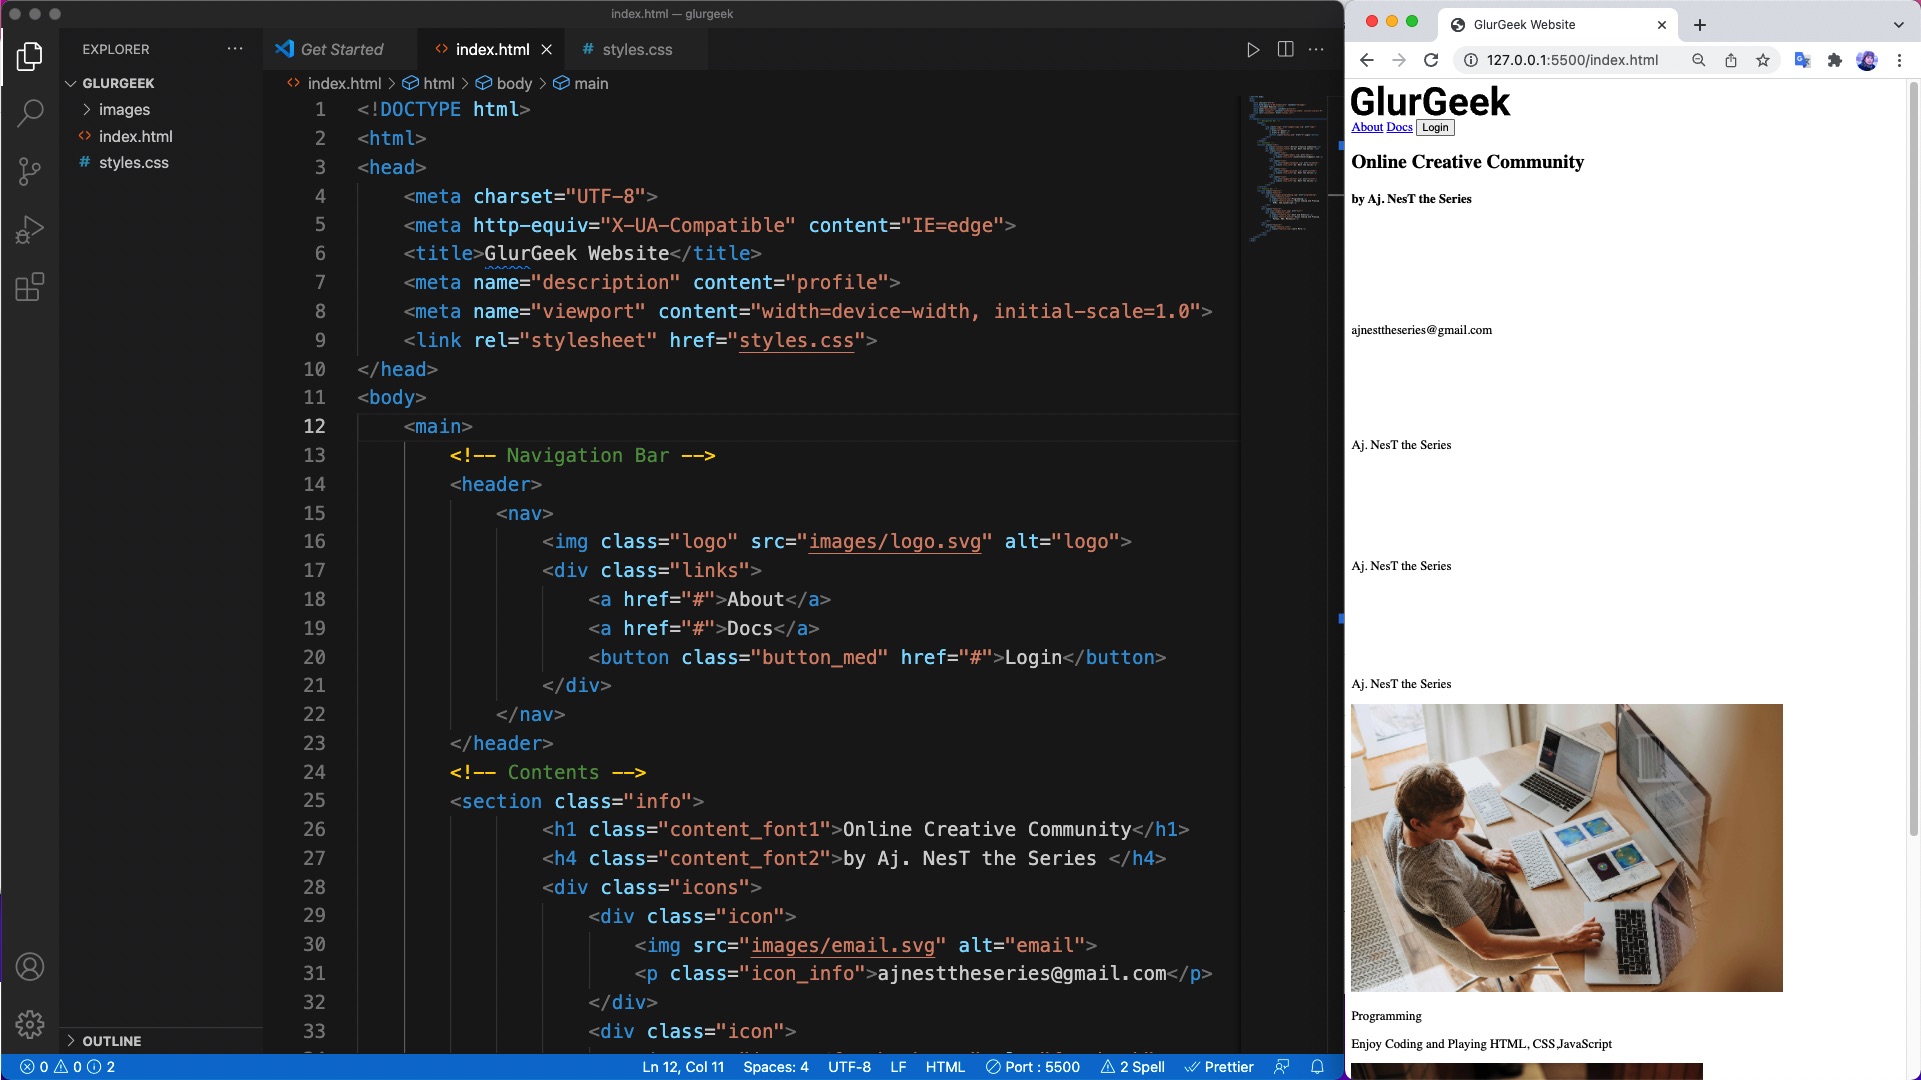

ถ้าใส่ <body style=”background-color: antiquewhite;”> ก็จะเห็น logo เนื่องจากทำเป็นสีขาวไว้
ในที่นี้เป็นการแสดงให้เห็น ของจริงจะไปเขียนใส่ในไฟล์ styles.css แทน


มาถึงตรงนี้ไฟล์ index.html ก็มีทุกอย่างครบแล้ว ต่อไปเราจะไปทำการจัดระเบียบด้วยไฟล์ styles.css
3.2 เขียนโปรแกรม CSS ไฟล์ styles.css
Part 1
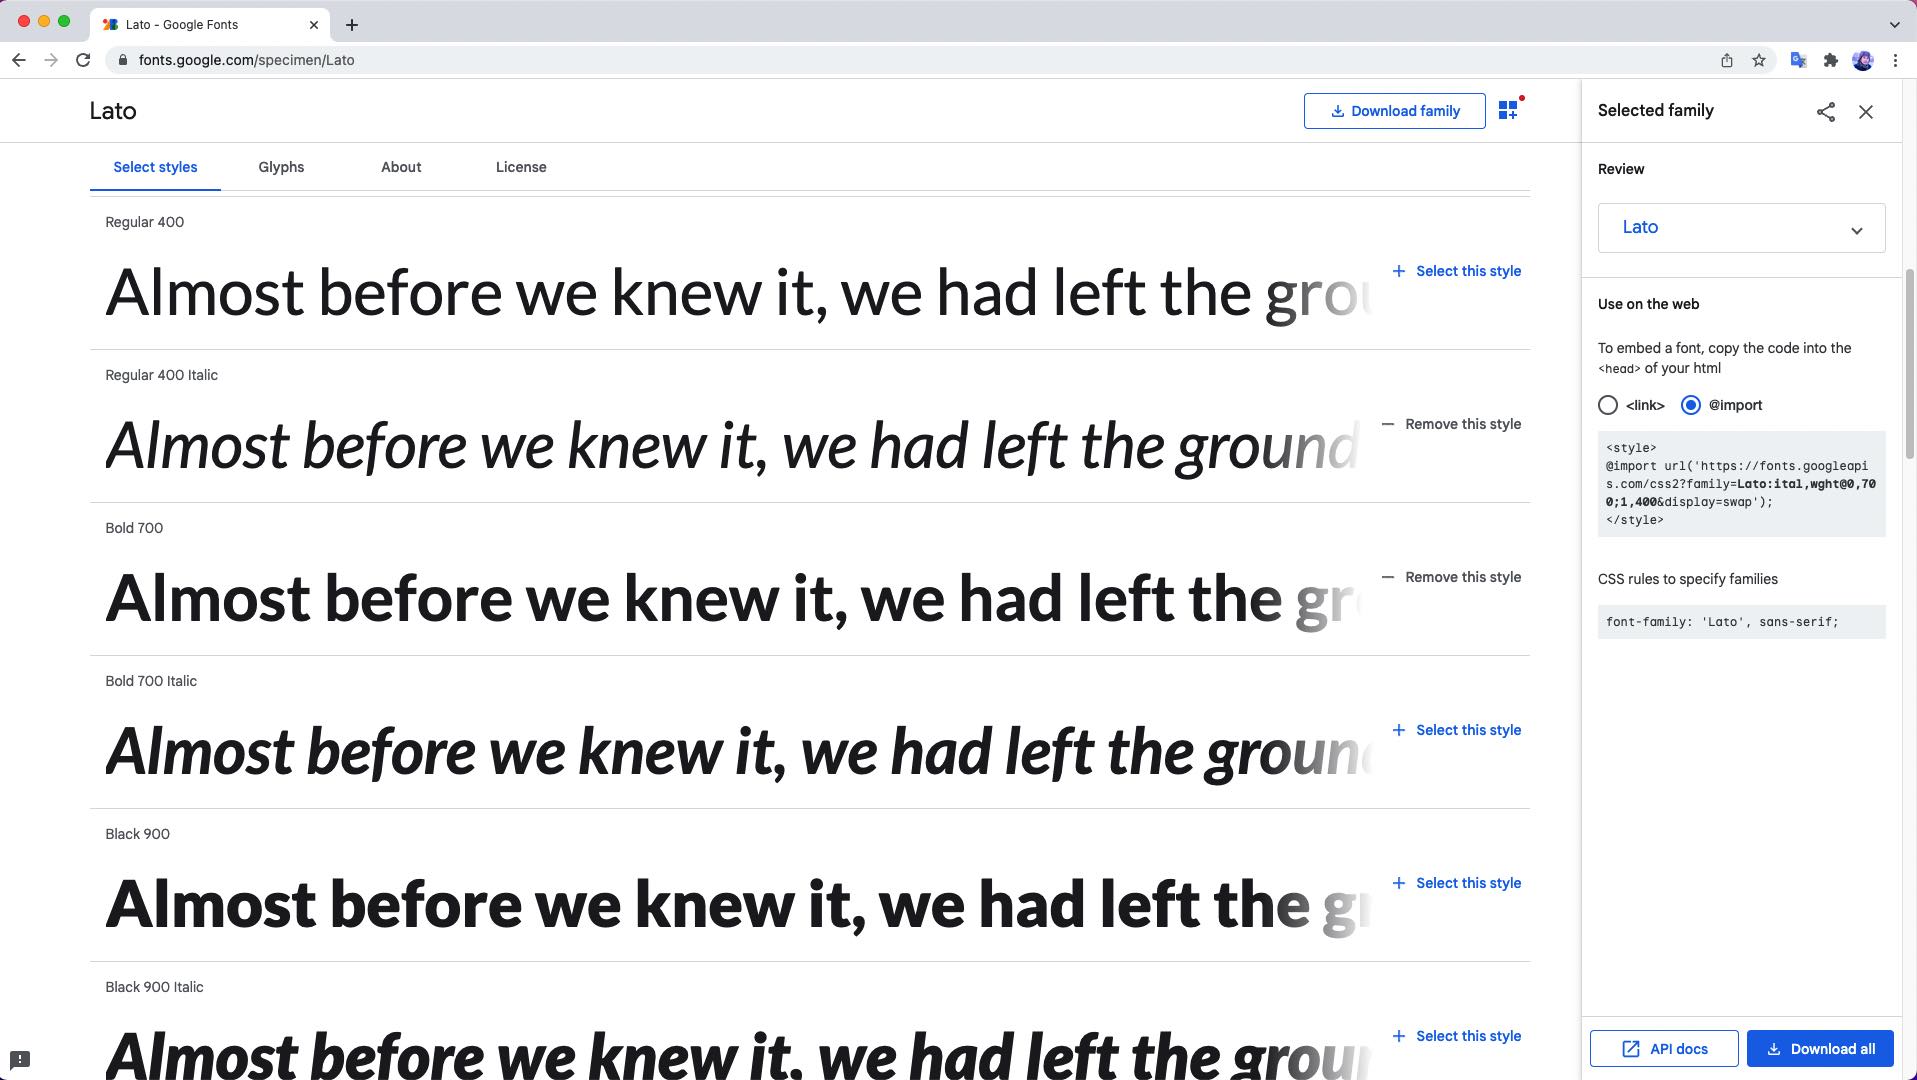
เลือก Font ที่อยากจะใช้เพื่อทำเว็บไซต์ให้สวยงาม
ใช้ Google Fonts ในที่นี้เลือกใช้ Lato https://fonts.google.com/specimen/Lato
เลือกขนาด 400 และ 700 ทำการ Copy ตัว CSS Code ตรง @import นำมาใส่ในไฟล์ styles.css
@import url('https://fonts.googleapis.com/css2?family=Lato:ital,wght@0,700;1,400&display=swap');
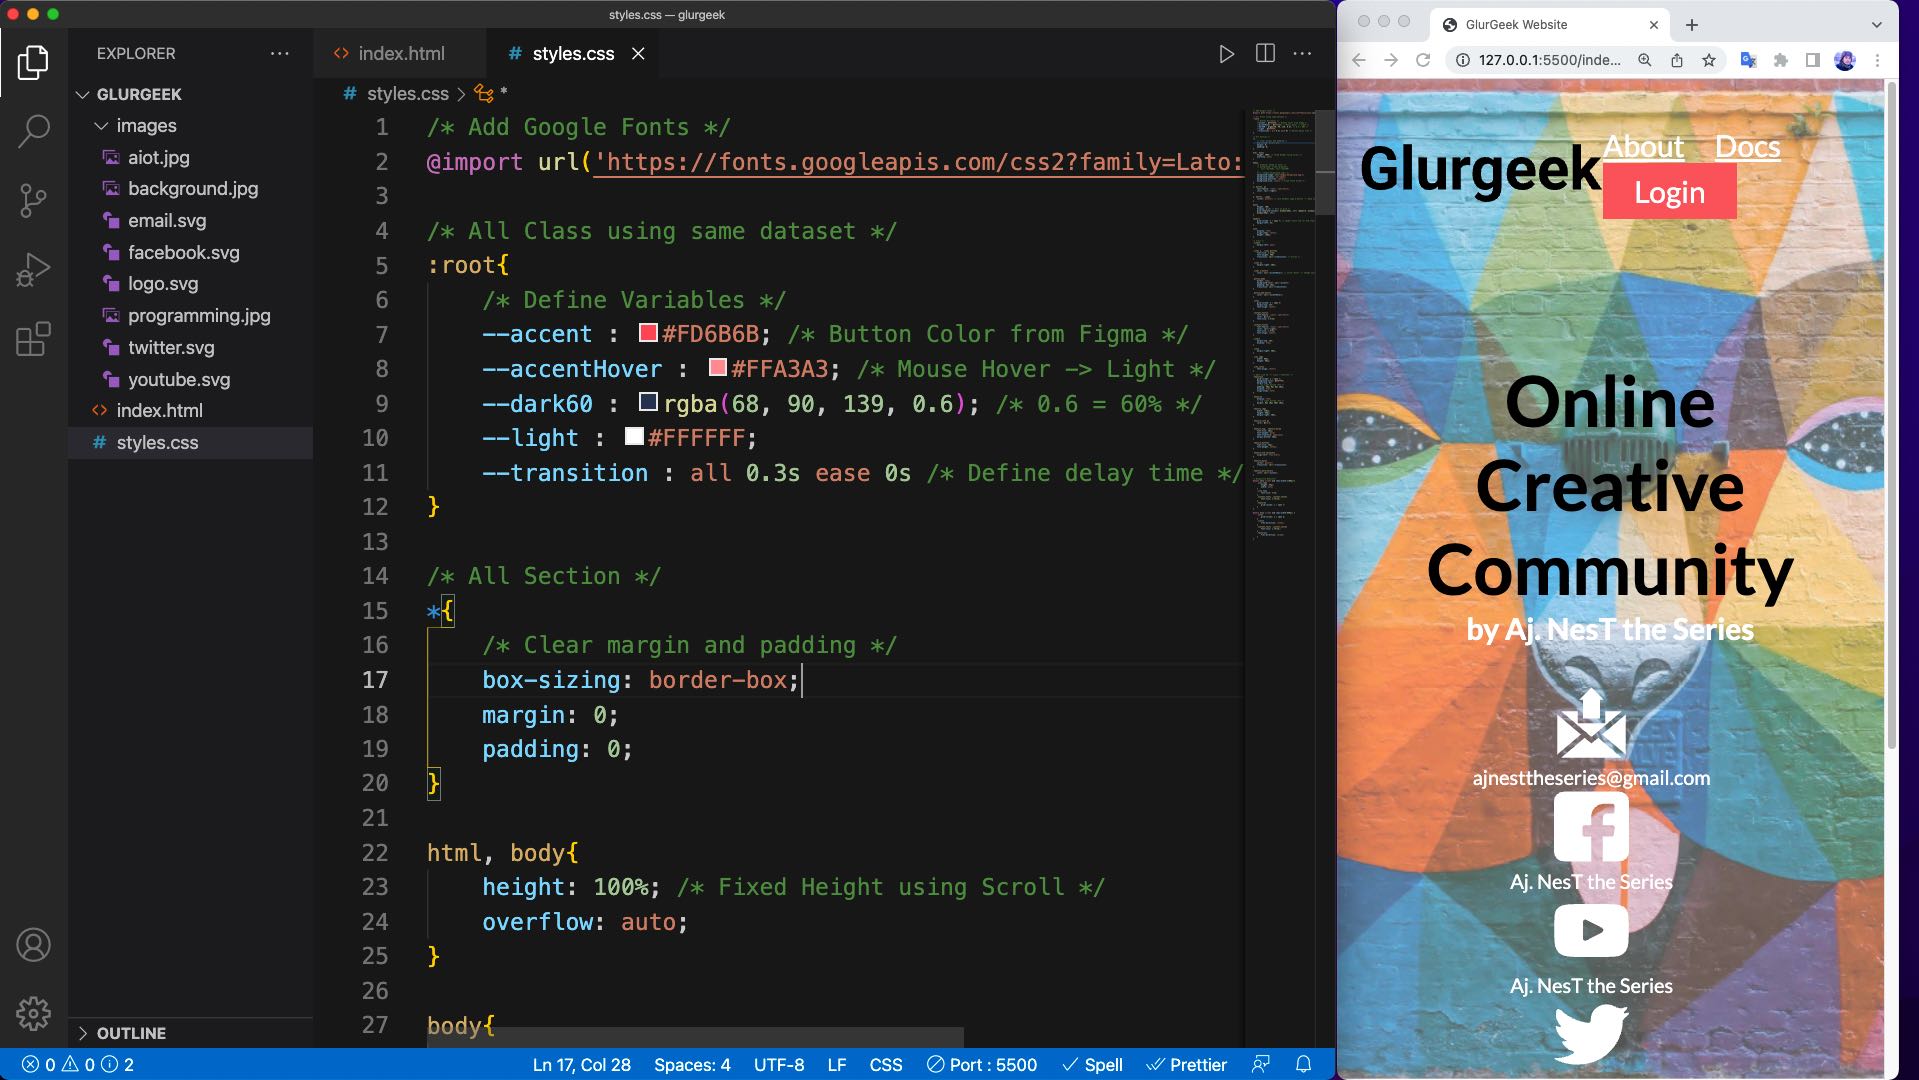
ไฟล์ styles.css
นำไฟล์ background ใส่ใน Folder ของ images
ทดลองเขียน sytles.css เบื้องต้น

PX to REM Converter
https://nekocalc.com/px-to-rem-converter
ไฟล์ styles.css Part 1
/* Add Fonts */
@import url('https://fonts.googleapis.com/css2?family=Lato:ital,wght@0,700;1,400&display=swap');

/* All Class using same dataset */
:root{
    /* Define Variables */
    --accent : #FD6B6B; /* Check Color Code from Figma */
    --accentHover : #F3B6B6; /* Mouse Hover -> Light */
    --dark80 : rgba(68, 90, 139, 0.8); /* 0.8 = 80% */
    --dark60 : rgba(68, 90, 139, 0.6); /* 0.6 = 60% */
    --light : #FFFFFF;
    --transition : all 0.3s ease 0s /* Define delay time */
}

/* All Section */
*{
    /* Clear margin and padding */
    box-sizing: border-box;
    margin: 0;
    padding: 0;
}

html, body{
    height: 100%; /* Fixed Height using Scroll */
    overflow: auto; /* Enter New Line */
}

body{
    /* Gradient Shade of Color */
    background: linear-gradient(
        var(--dark60), var(--dark60)
    ),
    url(./images/background.jpg);
    background-repeat: no-repeat;
    background-position: center;
    background-size: cover; /* Scale Fixed Screen */
}

a, button, p{
    font-family: "Lato", sans-serif;
    color: var(--light);
}

a, button, .logo{
    cursor: pointer; /* Link Element (Login) --> Hand Cursor */
}

main{
    height: 100%;
    display: grid; /* Work on grid*/
    grid-template-columns: minmax(60px, 1fr) repeat(6,minmax(50px,190px))
    minmax(60px,1fr);
}

header{
    grid-column: 2 / span 6; /* header start 2nd col & others last column */
}

nav{
    display: flex;
    align-items: center;
    height: 150px;
}

/* Class */
.links{
    margin-left: auto;
}

.links a, .links button{
    font-size: 1.5rem;
    font-weight: 400;
    transition: var(--transition); /* Action */
}

.links a{
    margin-right: 20px;
}

.links a:hover{
    color: var(--accentHover); /* Cursor Hover -> Change Color*/
}

.button_med{
    border: none;
    background-color: var(--accent);
    padding: 8px 25px;
    transition: var(--transition); /* Action */
}

.button_med:hover{
    color: var(--accentHover);
}

.info{
    grid-column: 3 / span 4;
    margin-top: 23%;
    text-align: center;
}

.content_font1{
    font-family: "Lato", sans-serif;
    color: black;
    font-size: 3.5rem;
}

.content_font2{
    font-family: "Lato", sans-serif;
    color: var(--light);
    font-size: 1.5rem;
}

.icons{
    margin-top: 10%;
    display: flex;
}
ผลลัพธ์ที่ได้ของ ไฟล์ styles.css Part 1
ไฟล์ index.html
<!DOCTYPE html>
<html>
<head>
    <meta charset="UTF-8">
    <meta http-equiv="X-UA-Compatible" content="IE=edge">
    <meta name="description" content="profile">
    <meta name="viewport" content="width=device-width, initial-scale=1.0">
    <title>GlurGeek Website</title>
    <link rel="stylesheet" href="styles.css">
</head>
<body>
    <main>
        <!-- Navigation Bar -->
        <header>
            <nav>
                <img class="logo" src="images/logo.svg" alt="logo">
                <div class="links">
                    <a href="#">About</a>
                    <a href="#">Docs</a>
                    <button class="button_med" href="#">Login</button>
                </div>
            </nav>
        </header>
        <!-- Contents -->
        <section class="info">
                <h1 class="content_font1">Online Creative Community</h1>
                <h4 class="content_font2">by Aj. NesT the Series</h4>
                <div class="icons">
                    <div class="icon">
                        <img src="images/email.svg" alt="email">
                        <p class="icon_info">ajnesttheseries@gmail.com</p>
                    </div>
                    <div class="icon">
                        <img src="images/facebook.svg" alt="facebook">
                        <p class="icon_info">Aj. NesT the Series</p>
                    </div>
                    <div class="icon">
                        <img src="images/youtube.svg" alt="youtube">
                        <p class="icon_info">Aj. NesT the Series</p>
                    </div>
                    <div class="icon">
                        <img src="images/twitter.svg" alt="twitter">
                        <p class="icon_info">Aj. NesT the Series</p>
                    </div>
                </div>
        </section>
        <!-- Feature Bar -->
        <section class="features">
            <div class="feature">
                <img src="images/programming.jpg" alt="programming">
                <div class="feature_info">
                    <p class="feature_top">Programming</p>
                    <p class="feature_bottom">Enjoy Coding and Playing
                        HTML, CSS, JavaScript</p>
                </div>
            </div>
            <div class="feature">
                <img src="images/aiot.jpg" alt="aiot">
                <div class="feature_info">
                    <p class="feature_top">AIoT and Robotics</p>
                    <p class="feature_bottom">Enjoy Coding and Playing
                        Python, ROS, Mechanics</p>
                </div>
            </div>
            <div class="feature">
                <div class="feature_info">
                    <p class="feature_more">Learn More</p>
                </div>
            </div>
        </section>
    </main>
</body>
</html>
ไฟล์ stylesheet.css
/* Add Google Fonts */
@import url('https://fonts.googleapis.com/css2?family=Lato:wght@400;700&display=swap');

/* All Class using same dataset */
:root{
    /* Define Variables */
    --accent : #FD6B6B; /* Button Color from Figma */
    --accentHover : #FFA3A3; /* Mouse Hover -> Light */
    --dark60 : rgba(68, 90, 139, 0.6); /* 0.6 = 60% */
    --light : #FFFFFF;
    --transition : all 0.3s ease 0s /* Define delay time */
}

/* All Section */
*{
    /* Clear margin and padding */
    box-sizing: border-box;
    margin: 0;
    padding: 0;
}

html, body{
    height: 100%; /* Fixed Height using Scroll */
    overflow: auto;
}

body{
    /* Gradient Shade of Color */
    /* background: linear-gradient(
        var(--dark60), var(--dark60)
    ),
    url(./images/background.jpg); */
    background-image: url("images/background.jpg");
    background-repeat: no-repeat;
    background-position: center;
    background-size: cover; /* Fixed Scale Screen */
}

a, button, p{
    font-family: "Lato", sans-serif;
    color: var(--light);
}

a, button, .logo{
    cursor: pointer; /* Link Element Logo & Button --> Hand Cursor */
}

main{
    height: 100;
    display: grid; /* Work on grid */
    grid-template-columns: minmax(60px, 1fr) repeat(6, minmax(50px, 190px))
    minmax(60px, 1fr);
}

header{
    grid-column: 1 / span 7; /* header start 1nd col and others last column */
    margin-left: 5%;
}

nav{
    display: flex;
    align-items: center;
    height: 150px;
}

/* Class */
.links{
    margin-left: auto;
}

.links a, .links button{
    font-size: 1.5rem;
    font-weight: 400;
    transition: var(--transition); /* Action */
}

.links a{
    margin-right: 20px;
}

.links a:hover{
    color: var(--accentHover); /* Cursor Hover --> Change Color */
}

.button_med{
    border: none;
    background-color: var(--accent);
    padding: 8px 25px;
    transition: var(--transition);
}

.button_med:hover{
    color: var(--accentHover);
}

.info{
    grid-column: 3 / span 4;
    margin-top: 23%;
    text-align: center;
}

.content_font1{
    font-family: "Lato", sans-serif;
    color: black;
    font-size: 3.5rem;
}

.content_font2{
    font-family: "Lato", sans-serif;
    color: var(--light);
    font-size: 1.5rem;
    text-align: center;
}

.icons{
    margin-top: 10%;
    display: flex;
}

.icon{
    margin-right: 30px;
}

.icon img{
    width: 60px;
    height: 60px;
}

.icon_info{
    text-align: center;
}

/* Edit Line 48 --> class ="features" */
.features{
    grid-column: 2 / span 7;
    background-color: #EBFF00;
    margin-top: 6%;
    /* top right bottom left */
    padding: 30px 0px 0px 20px;
    display: flex;
    align-items: left;
}

.feature{
    display: flex;
    /* top right bottom left */
    margin: 0px 10px 30px 10px;
}

.feature img{
    width: 130px;
    height: 80px;
    margin-right: 20px;
}

.feature_info p{
    color: black;
}

.feature_top, .feature_more{
    font-size: 20px;
    font-weight: bold;
    text-transform: uppercase;
    margin-bottom: 20px;
}

.feature_bottom{
    font-size: 15px;
    font-weight: normal;
}

.feature:nth-child(3){
    align-self: flex-start;
}

.feature_more{
    cursor: pointer;
    transition: var(--transition);
}

.feature_more:hover{
    color: var(--accent);
}

/* Responsive Website*/
@media only screen and (max-width:1100px){
    .icon img{
        height: 55px;
        width: auto;
    }
    .content_font1 .content_font2{
        font-size: 2.75rem;
    }
    .feature{
        grid-column: 1 / span 7;
    }
}

@media only screen and (max-width:850px) {
    .info{
        grid-column: 2 / span 6;
    }
    .icons{
        flex-direction: column;
    }
    .content_font1 .content_font2{
        font-size: 1.75rem;;
    }
    .features{
        flex-direction: column;
    }
}
Output ผลลัพธ์ไฟล์ของการทดลองนี้
https://github.com/ajnesttheseries/htmlcssfontend/tree/main/glurgeek
บทเรียนก่อนหน้านี้
1. เรียน NodeJS Back-End Developers (เริ่มสร้าง Back-End Development)
https://www.glurgeek.com/education/startnodejs
2. Figma ออกแบบเว็บไซต์ สำหรับ Front-End Designers (เตรียม Front-End Design)
https://www.glurgeek.com/education/figmawebdesigner
คุณอยู่บทเรียนที่ 3
3. Figma ออกแบบเว็บไซต์ สำหรับ Front-End Designers (เตรียม Front-End Development)
https://whttps://www.glurgeek.com/education/htmlcssdesigntodev
บทเรียนถัดไป
4. เรียน NodeJS Back-End เชื่อมต่อ EJS HTML CSS Front-End Developments (เขียนให้ Back-End เชื่อมต่อ Front-End Developments)
https://www.glurgeek.com/education/startnodejsandfrontend


